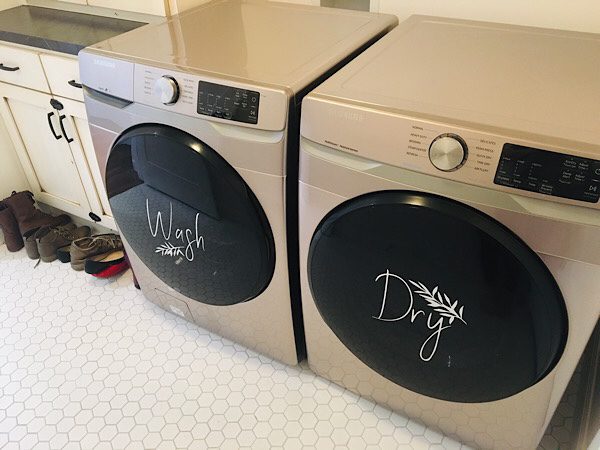
I wanted to make some washer and dryer vinyl decals to brighten up our laundry room. Today instead of vinyl, I used contact paper, plus another interesting surprise…
This post may contain affiliate links. As an affiliate, I make a commission on qualifying purchases at no extra cost to you. See Disclaimer for more details.
There was a bit of a Cricut emergency this morning, I lost both of my mats.
I literally had them two days ago! I have no idea where they are!
Don’t ask me how you could lose something so big…..
It almost ruined my morning because I wanted to cut some vinyl for my washer and dryer.

Luckily I came across this video:
I guess I’m late to the no-mat party but better late than never! So I decided it was a great time to experiment.

How I cut vinyl without a mat with a Cricut:
First I made my cut image in Cricut Design Space. I have seen some very cute washer and dryer vinyls with florals and wreaths on Pinterest, that is what inspired me.
I decided to do a little more simple design that just said “Wash” “Dry” and some leaves.

The font I used is called Stay Classy by SolidType, it’s one of my favorites and I use it all the time. It is very elegant and feminine. (I love all their other fonts too!)
I found the floral elements on FreePik (as always) and uploaded them into design space to isolate just one leaf shape.

After the designs looked how I wanted, I encountered my second vinyl emergency of the morning.
The white vinyl I was going to use was actually HTV (heat transfer vinyl), not adhesive. (Side note: If you are new to Cutting Vinyl, Cricut has a great “lingo” guide HERE.)
Dang it. Morning almost ruined again.
But wait! I remembered I had a whole brand new roll of white contact paper I bought from Walmart to line some shelves with!!
I have never tried cutting contact paper but I hear that lots of people do it with success!
So I was going to try two new experiments today: using my cricut without a mat to cut contact paper!
Cross my fingers!
I loaded the contact paper and made sure it was under both sets of grey rollers, and did a test run.

The “Vinyl” setting didn’t work for me so I tried it on the “Vinyl+” setting and it totally worked!!

It’s a Christmas miracle!
I can tell it’s not quite as smooth of a cut as normal, but it looks pretty darn good considering. There were a few areas that looked like the blade had trouble but I was actually impressed.

Weeding The Contact Paper
Unsurprisingly, weeding it was a little trickier than weeding my regular Siser Easy Weed (my favorite brand right now), but I went slow and it mostly broke away fine.


For some reason one section at the end of the ‘Y’ seemed to not have cut through, (maybe my blades are dull?) so I just cut that part with my scissors.

I transferred the vinyl to the transfer paper…

It’s working! So far so good.
Then I centered it on my dryer door, and scraped it with a card to attach it as normal.

I peeled it back for the moment of truth…

SUCCESS!

Repeat for the other side.


Then I added the leaf elements last.

When it was done I was so pleased. It went much better than expected.
I’ve never used this particular transfer paper before, it worked really well and I plan to use it again soon on another project.

Two Cricut Emergencies solved. I’m more impressed with my good old Explore every day.


That’s it! It was surprisingly super easy and I think it turned out really cute. It definitely adds a cute little personalized touch to the laundry room.
Should’ve done it sooner!
If you want to make these decals too, here are some free downloads you can use in Cricut design space to cut your own! Just right click on the images to download them.



Check out my other Cricut Posts:
